
Hospital Registration Kiosk Hardware: A Privacy-Conscious Specification Framework
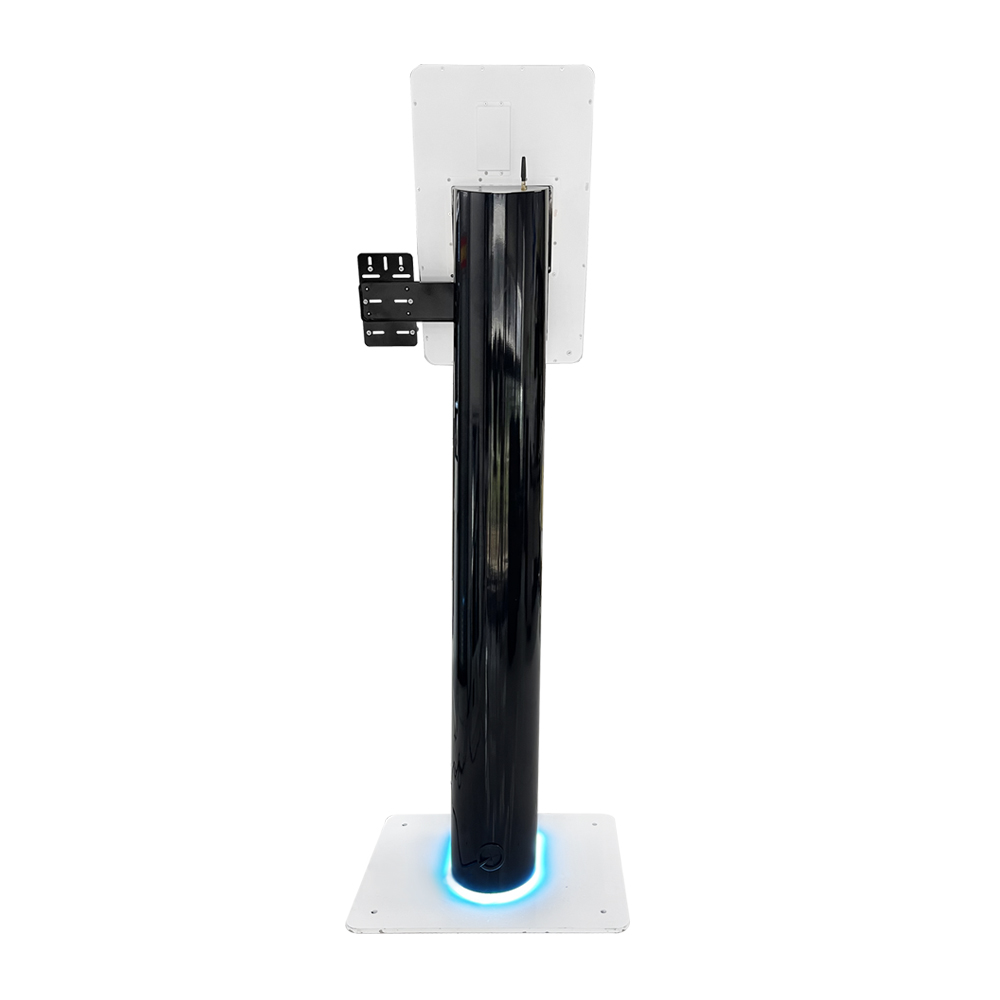
Hospital registration kiosk hardware is the set of touchscreen, identity, printing, scanning and payment modules that lets a patient check in without staff help. A standard build combines a PCAP touchscreen, an identity reader, an 80 mm thermal printer and a document scanner, with payment and A4 printing added only when the workflow and local rules require them.
This framework treats the specification as five decisions a buyer must make and defend: identity method, module bay loadout, form factor, reach geometry, and privacy-by-design placement. Each decision is paired with the touch and display qualification work that the qualification articles on this site already require.
What does a patient check-in flow actually look like on a kiosk?
A hospital check-in kiosk flow runs in six hardware steps. Each step maps to one module group, and the sequence is what should be agreed with the software vendor before the bill of materials is written.
- Identify. Patient scans a card, QR code or document. Module: 2D barcode/QR scanner plus identity reader.
- Confirm. The terminal displays the appointment and asks for verification. Module: touchscreen.
- Capture. Insurance card or referral letter is imaged. Module: document scanner (flatbed or feed-through).
- Sign. Consent and intake forms are signed on glass or via a signature pad. Module: touchscreen or signature pad.
- Pay. Copay is settled by card or contactless. Module: certified payment terminal bay.
- Print and queue. Receipt, label or queue ticket is issued and the patient is directed onward. Module: 80 mm thermal printer, optional A4 printer.
Agree this flow with the software vendor before the bill of materials is written, because step order drives which modules sit at seated height and which sit above it.
Checklist: which hardware modules does a patient check-in kiosk need?
A patient check-in kiosk hardware list should follow the workflow rather than a maximum-spec wish list. Most deployments need a touchscreen, an identity reader, a printer and a barcode scanner; the rest are conditional. A [1] defines the category as a floor-standing, wall-mounted or desktop touchscreen terminal that handles check-in, ID and insurance scanning, form signing, copay payment and queue ticketing without staff assistance.
| Module | Role in the flow | Spec points to check | Required / optional / region-dependent |
|---|---|---|---|
| Touchscreen | Every step; primary input surface | Size, PCAP touch points, glove and stylus behaviour | Required |
| 80 mm thermal printer | Receipt, label, queue ticket | Paper width, print speed, autocutter, driver availability | Required in most builds |
| Document scanner | Insurance card, referral, signed paper | Resolution, feed vs flatbed, image storage path | Required |
| 2D barcode / QR scanner | Appointment code, patient ID | Symbologies supported, scan window height, SDK | Required |
| Identity reader | National ID, health card, card-based verification | Card types, interface, local ID norms | Region-dependent |
| Payment terminal bay | Copay and self-pay settlement | Certified terminal model, mounting, cable routing | Region-dependent |
| Camera | Identity check, remote assistance, wayfinding | Field of view, height, privacy shutter | Optional |
| Speaker and 3.5 mm audio jack | Voice guidance and accessible output | Output level, jack accessibility, headset support | Required for accessibility |
| Optional A4 printer | Full-page intake forms, itemised bills | Media handling, jam access, consumable cost | Optional |
Always confirm whether a medical kiosk with ID scanner and printer must clear local medical-device or data rules before it can be installed in a clinical area — that answer changes which peripherals are permissible at all.
Choosing the identity and payment modules without overbuilding
The identity path is the first decision to lock, and it should follow local ID norms rather than a generic global spec. A reader that suits one health system rarely travels. For kiosk hardware for HIS/EMR integration, choose a healthcare kiosk OEM ODM platform whose software development kit and Linux drivers are already published, because integration cost typically exceeds the peripheral cost difference.
- Match the reader to the jurisdiction. Magnetic stripe, contact and contactless IC, NFC and national-ID formats differ by country; specify the exact document set the site will accept.
- Prefer a modular peripheral bay over a soldered-in reader. Multi-site or multi-country rollouts can then swap one module instead of re-tooling a whole enclosure.
- Keep payment out of the enclosure. A certified third-party terminal keeps payment security scope and certification liability with a specialist vendor; a generic card reader pulled inside the kiosk shifts that burden onto the integrator.
- Size the bay for the largest module you may later need, not just the one you are ordering now.
- Check consumables last. Ticket and label stock, ribbon and paper roll specifications determine lifetime running cost, not purchase cost.
The PCI argument above is the standard industry position of the payment-card security body, which sets the requirements that certified terminals are evaluated against.
What size and form factor should you choose - 21.5, 27 or 32 inches?
Form factor follows installation environment and patient movement, not screen ambition. A [2] makes the same point: installation options should be evaluated against available space and patient flow, since a hospital lobby, a clinic registration kiosk counter and an outpatient corridor impose different structural requirements.
| Form factor | Best use | Trade-offs | Module depth limits |
|---|---|---|---|
| Floor-standing | Registration halls, high throughput | Largest footprint; must be anchored | Deepest; fits printer, scanner, payment bay |
| Wall-mounted | Corridors, compact clinic reception | Screen height fixed once installed | Shallow; limits printer and payment options |
| Desktop | Small clinic front desk, staff-assisted overflow | Low reach height; easier to displace | Moderate; often external peripherals |
| Curved | Feature lobbies, wayfinding walls | Custom enclosure tooling; higher unit cost | Configured per project; confirm with supplier |
Two decisive lines. First, bigger screens push the top of the interactive area upward and work against accessibility, so a 32-inch panel demands a lower or height-adjustable interaction zone. Second, portrait orientation suits vertical intake forms, but it must be confirmed at both panel level and OS-image level before ordering, because some panels and operating-system builds ship in landscape only.
How do you make a hospital registration kiosk accessible?
Accessibility is a reach-geometry problem before it is a feature list. In the United States, the relevant benchmark is the ADA Standards for Accessible Design, which sets a side reach range of 15 to 48 inches above the finished floor; other jurisdictions set their own ranges, so confirm the applicable local standard rather than assuming one dimension applies worldwide.
Design decisions that follow from that:
- Reach range. Keep every interactive control inside the side reach band, measured from the finished floor, and state the target band in the tender.
- Clear floor space. Provide a level approach that allows a wheelchair to pull in parallel to the kiosk face, not only head-on.
- Height strategy. Choose a low fixed interaction zone or a height-adjustable console; do not mix a tall screen with low controls and call it accessible.
- Non-visual output. A 3.5 mm audio jack and voice guidance cover users who cannot read the screen.
- Visual clarity. High-contrast labelling and a screen angle that avoids glare from lobby glazing.
- Peripheral placement conflict. Printers and scanners fitted low enough for a seated user to reach may need to move if the same modules are also operated by a standing user; resolve this in the 3D model, not on site.
For a hospital self service kiosk, the ordering of these decisions matters: reach band first, then module positions, then enclosure styling.
Privacy and data handling: what the hardware dictates
Healthcare self-service kiosk hardware is a regulated data touchpoint in most jurisdictions, which makes placement and capture design part of the specification rather than an afterthought. Rules differ by country, so confirm the applicable obligations with your compliance function before the enclosure drawing is frozen.
Placement
- Set camera height and field of view so the lens captures the patient at the device and not the neighbouring terminal, the queue, or a public corridor behind them.
- Fit a physical privacy shutter where the camera is optional to the flow.
- Position payment entry and identity capture away from the main walking line, so on-screen content is not visible to passers-by.
Capture
- Use privacy filters on screens that face open lobby space.
- State in the spec which biometric or identity data is captured, where it is processed, and whether it leaves the device.
Retention
- Define the session timeout and the on-screen data clearing behaviour, since a kiosk left mid-session can display another patient’s details.
- Specify where signed documents and scanned images are stored — local device, kiosk-managed storage, or the hospital information system — because that choice determines the kiosk’s own data-protection obligations.
- Confirm whether the device must support remote wipe and full disk encryption. Basic hardware specification tables published by kiosk makers list the industrial PC, storage and interface set but say nothing about data handling, so this must be written into your own requirement ([4]).
Specifying touch and display for a high-traffic lobby
The touchscreen and kiosk enclosure design are the two parts of the spec most likely to be re-qualified after ordering, so treat them as change-controlled items. Enclosures for healthcare, hospitality and public-service projects are typically offered in floor-standing, desktop and wall-mounted structures with configurable screens, printer, scanner and payment module layouts ([3]), which means the same electronics can sit in several different mechanical builds.
- PCAP touch count and behaviour. Confirm how many simultaneous touch points the controller reports and whether it must respond through medical gloves or a stylus, since gloved input is common in clinical settings.
- Brightness and anti-glare. Glazed lobbies produce specular reflections; specify anti-glare treatment and check the brightness figure against measured ambient light.
- Enclosure finish. Confirm tolerance to hospital-grade cleaning solvents, and get that in writing from the supplier.
- Qualification consequences. Changing panel orientation, adding peripheral weight, or substituting the enclosure each require the touch baseline to be re-verified before volume production; see touch re-baselining for the devices and touch qualification for 21.9-inch portable smart screens. The same principle applies to display units built for menu boards, where re-baselining touch qualification for KDS covers the parallel case.
Question-and-answer set for the specification meeting
Which hardware modules does a hospital kiosk need? Touchscreen, identity reader, 2D barcode scanner, document scanner and an 80 mm thermal printer cover most check-in flows. Payment terminal, camera and A4 printing are added only when the workflow or local rules demand them.
How do you make a hospital kiosk ADA-compliant? Keep all controls inside the applicable reach band, provide clear floor space for a wheelchair approach at the kiosk face, and add audio output plus high-contrast labelling. US and non-US requirements differ, so confirm the local standard before freezing the drawing.
What size and form factor should you choose? A 21.5-inch floor-standing unit suits compact clinic reception areas; 27 inches fits most registration halls; 32 inches only works if the interaction zone is lowered or made adjustable, because a higher screen top works against accessibility.
What does a patient check-in flow look like on a kiosk? Six steps: identify, confirm, capture, sign, pay, then print and queue. Each step maps to one module group, and the sequence should be agreed with the software vendor before the bill of materials is written.
What drives per-unit cost? Screen size, enclosure tooling and module count dominate. Payment certification, custom branding and packaging are secondary, while consumables such as ticket stock show up in running cost rather than unit price.
What consumables should the spec name? Ticket and label paper width, printer speed and autocutter life, plus service access for roll changes. Naming them lets procurement compare running cost across suppliers instead of purchase price alone.
Take this checklist into the tender: lock the six-step flow, map modules to steps, set the reach band, then place the camera and payment bay for privacy. That sequence turns a module list into a specification a buying committee can defend.
Content reviewed: 2026-09-13.
Evidence confidence
Confidence: Medium. This rating reflects cross-checking 4 sources across 4 independent domains. It measures evidence coverage, not certainty; verify safety-critical work against manufacturer instructions and local requirements.
References
APA 7th edition
- ↑Posaio. (n.d.). Hospital Self Service Kiosk: 2026 Hardware Buyer's Guide - POSAIO. Retrieved September 13, 2026, from https://www.posaio.com/hospital-self-service-kiosk-guide/.
- ↑Suntekai. (2026). Check-In Kiosk Hardware for Healthcare Self-Service. https://www.suntekai.com/blog/check-in-kiosk-healthcare/.
- ↑Ikinor Interactive. (n.d.). Self-Service Kiosk. Retrieved September 13, 2026, from https://ikinor-interactive.com/self-service-kiosk.
- ↑Lkskiosk. (n.d.). Self Service Check In Kiosks At Airports/Hotel Check in Kiosk/Hospital Check in Kiosk with Custom Design by LKS. Retrieved September 13, 2026, from https://www.lkskiosk.com/quality-2570533-self-service-check-in-kiosks-at-airports-hotel-check-in-kiosk-hospital-check-in-kiosk-with-custom-de.
You should also read:
Building an Accessibility Spec for Commercial: A Spec-Building Framework for Education OEM Deployments
Introduction: Why Accessibility Belongs at the Procurement Stage, Not After It Building an accessibility spec for commercial tablet procurement should start before you issue a purchase order, not after units arrive on campus. For a commercial tablet built as a private-label OEM device, accessibility is…
Continue reading...
Touch Screen Qualification for Self-Service Kiosks: Recalibrating the 2026 Protocol
Why 2026 Changes Touch Qualification for Self-Service Kiosks The 2026 shift makes touch screen qualification for self-service kiosks a hardware-engineering decision, not just a specification review. The US interactive kiosk market is projected to grow from USD 6.79 billion in 2025 to USD 9.53 billion…
Continue reading...
Touch Qualification for AI Voice-Hybrid Kiosks: Balancing Gloved, Wet and Multi-Touch Input
Why Voice-Hybrid Kiosks Change Touch Qualification Adding a voice layer does not remove the touchscreen — it adds interaction states that touch input must not conflict with, and touch qualification for AI voice-hybrid kiosks has to account for all of them. A voice-hybrid kiosk accepts…
Continue reading...